All You Need To Know About: Micro-blading
If you’re tired for having to use a combination of brow pencils, brow gels, brow pomades, and even soaps every single day, then the answer to your problem just might be microblading, a semi-permanent form of brow tattooing.
Keep reading the article to read more on what this is and find out if you’re a suitable candidate for micro-blading this time, and then about its benefits, process, healing time, results, how to prepare for a session and after-care details.
What is the difference between a traditional tattoo and a microblading tattoo?
Microblading is a form of tattooing, however it’s now not permanent like a true tattoo is. Unlike traditional tattoos, which use a tattoo gun, microblading uses a blade-shaped tool with a row of tiny, barely visible needles to create hair-like strokes along your brows while depositing pigment into your skin. The result? Realistic-looking brow hairs that don’t wash off for a year or more.
Traditional tattoos use concentrated tattoo ink, whilst cosmetic tattoos, such as in this case, use smaller pigment particles—but the way they are applied differ from each other.
With microblading, the pigment is applied superficially on your skin, so that it eventually metabolizes it till it fades away.
Whereas in the case of a permanent tattoo, the pigments are positioned into your skin’s deeper layers, which makes them stay permanently.
Because of the pigment used and the manner it’s applied out to the skin, microblading produces a semi-permanent “tattoo” that looks soft and diffused, as opposed to opaque and brilliant as with traditional tattoos. Over time, the pigment for your brows will also lighten a tone or two from its unique coloration.
Who is a good candidate for micro-blading?
A good candidate for microblading isn’t necessarily based on how little (or how much) brow hair you naturally have—it’s more based on your skin type.
Is your skin super reactive and sensitive? Do you have keratosis pilaris on your forehead? Do you currently or consistently deal with breakouts or cystic acne around your brows? Is your skin prone to allergies or other types of topicals?
If the answer to any of the questions above is yes, then you may not be a great candidate at the moment, since microblading will initially cause some inflammation that can exacerbate skin conditions and affect your tattoo’s healing process. Also, oil can make microblading fade faster, so you’ll get less time with your microbladed brows if your skin is very oily.
Consultations with Lash and Brow Corner Aestheticians
Remember, the end result that we are working for is an illusion of fuller brows. Our talented aestheticians can create almost any look: from a very natural light finish to a beautifully bold brow. First, she will consult with you about the best brow shape for your face and choose a colour that matches the natural hair colour and skin undertone.
We recommend you to have a quick consult and be prepared mentally about the treatment, so you confidently book for an appointment later. Don’t forget to bring in pictures for inspiration so that we have a better understanding about the kind of results you’re seeking. Our aestheticians are also able to create a custom colour using several shades that match your natural hair colour, so your brows will look multidimensional and real.
Preparing for a session
Our recommendations for the preparation of a micro-blading sessions:
- Avoid caffeine beverages or alcohol on the day of the procedure.
- Tinting brows before the appointment.
- No tanning or sunbathing for 3 days before the appointment.
- No waxing or plucking eyebrows within 2 days beforehand.
- No chemical peels and other intense facial treatments for at least 2 to 3 weeks before the procedure.
- Wash and style hair before the procedure, as the brows must not come into contact with water for at least 7 days.
- Discontinuing vitamin-A (Retinol) and Botox treatments for at least 1 month beforehand.
- Stopping taking fish oil or any other natural blood thinners, such as vitamin E, at least 1 week before the procedure.
- Avoiding aspirin or ibuprofen for pain relief (as these types of medications are blood thinners).
- Not working out the day of the appointment.
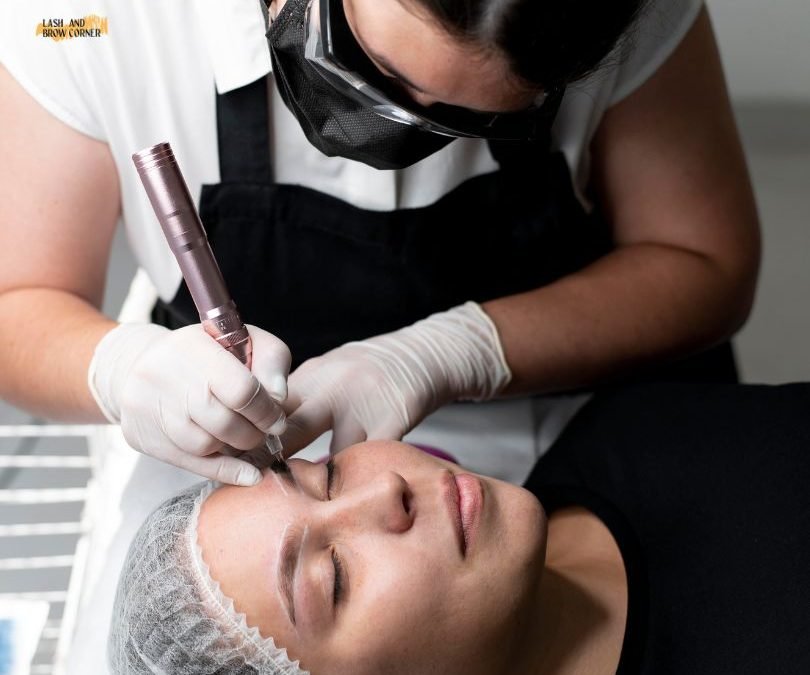
What is the process like once the session begins?
Once all is decided and your appointment begins, the aesthetician begins by cleaning the brow area and numbing it for the treatment. She’ll apply a topical and let it sit for some time. Then, as expressed earlier, instead of using a tattoo machine, she will use a little handheld tool to manually draw hair strokes that takes a short while (30-40 minutes), depending on how thick and refined you want your look to be.
It’s important to remember that the actual microblading process isn’t just a few single strokes across your skin—it essentially requires a few rounds of numbing, pigments, and strokes.
Lastly, she will apply an ointment to help with the healing process. Your eyebrows will appear darker immediately after the initial treatment, but it is possible that the colour will fade after a few weeks and a touch-up may be needed.
Most people do actually require a touch-up to finalize the brows 4-8 weeks after their first session. An appointment with Lash and Brow Corner includes a touch-up without an additional cost.
How long do the results last?
The results can last anywhere from 1–2 years, sometimes even longer. In one year, you’ll likely notice some fading, but your microblading probably won’t totally be gone. By three years, though, you can expect your microblading to be nearly untraceable. However, consistent touch-ups every 12-18 months can help your microbladed brows look fresh throughout the years.
What is the healing process?
Microbladed brows will fully heal in about a month. Redness, swelling, and scabbing are some very common occurrences after a microblading in the first 5-7 days, but here are some after-care tips to help with the healing process:
- Gently washing over the eyebrows with a fingertip, using antibacterial soap and water for about 10 seconds, rinsing, and then patting dry.
- Using a minimal amount of moisturizing ointment on the face.
- Apply an antibacterial ointment to your brows every two hours for the first 24 hours, along with a layer of Vaseline or Aquaphor morning and night for a week to keep the area moist and protected.
- Keeping the brows away from water for 7–10 days, which includes not taking long showers or swimming.
- Avoiding putting makeup on the brow area while it is actively healing to keep the area as clean as possible.
- Not picking at the scabs.
- Avoiding direct sunlight or tanning for at least 4 weeks after the procedure.
- Not using facial scrubs or peels for at least 4 weeks after the procedure.
- Not sleeping on the face for at least 10 days after the procedure.
Once the skin has healed, you can protect your eyebrows and help prevent the colour from fading by applying sunscreen on the microbladed area.
Write to us if you have any more questions or queries.